
Diorama Ornament DIY
There’s something charming about handmade ornaments that make trimming your Christmas tree extra special! The DIY Ornament Kit includes two paper mâché balls which you can turn into FOUR diorama ornaments. So put on your crafting apron, play your favorite holiday album, and we’ll show you one way to create a miniature winter wonderland scene.
Materials Needed:
- DIY Ornament Kit
- Hot Glue Gun
- Hot Glue Sticks
- Scissors
- Pin Drill or Awl
- 2 White 1-inch Pom-Poms
- 0.5-inch Black Pom-Pom
- Black Felt cut into 0.75-inch round circle
- Orange Felt cut into 0.5-inch long triangle
- Ribbon
- 2 Tiny Black Buttons
- Black Sticky Beads
- Miniature Bottle Brush Tree
- 2 Miniature Presents
- Fiber Fill
- 2 Fuzzy Sticks
- Bow

Instructions:
Step 1
Paint the inside of a half sphere with blue paint. Once dry, paint the outside with white paint. Carefully set aside to dry where it won’t be disturbed.


Step 2
While the paint dries, let’s assemble the snowman! Make the face by sticking a couple sticky beads onto the white pom-pom for the eyes and glue the orange felt for the carrot nose.


Step 3
For the hat, glue the black pom-pom on top of the black felt. Then glue the hat on top of the head.


Step 4
For the body, glue a couple buttons onto another white pom-pom. Then glue the head onto the body.


Step 5
Wrap a bit of red ribbon around the neck and secure with a bit of glue to make a scarf. Your mini frosty snowman is ready!


Step 6
Once the paint is dry, use the gold paint marker to draw some stars on the inside of the sphere.

Step 7
Use a pin drill and carefully make a hole on top of the sphere. Don’t drill the hole too close to the edge to counterbalance the weight of the ornament. Otherwise, the ornament will face upward instead of forward.

Step 8
Measure and cut a 6-inch piece of string. Tie a double knot at the end.


Step 9
Thread the string through the hole.

Step 10
Glue a pipe cleaner around the circumference of the sphere. Repeat using another pipe cleaner for extra texture and fluff.

Step 11
Now we’re ready to fill the diorama! To make a snowscape, glue the fiber fill onto the inside bottom of the sphere.

Step 12
Then glue the snowman, tree, and present on top of the snow.


Step 13
Sprinkle a bit of snowflake glitter on top for extra sparkle! There’s no need for glue as the edges of the snowflakes will catch onto the fiber fill.

Step 14
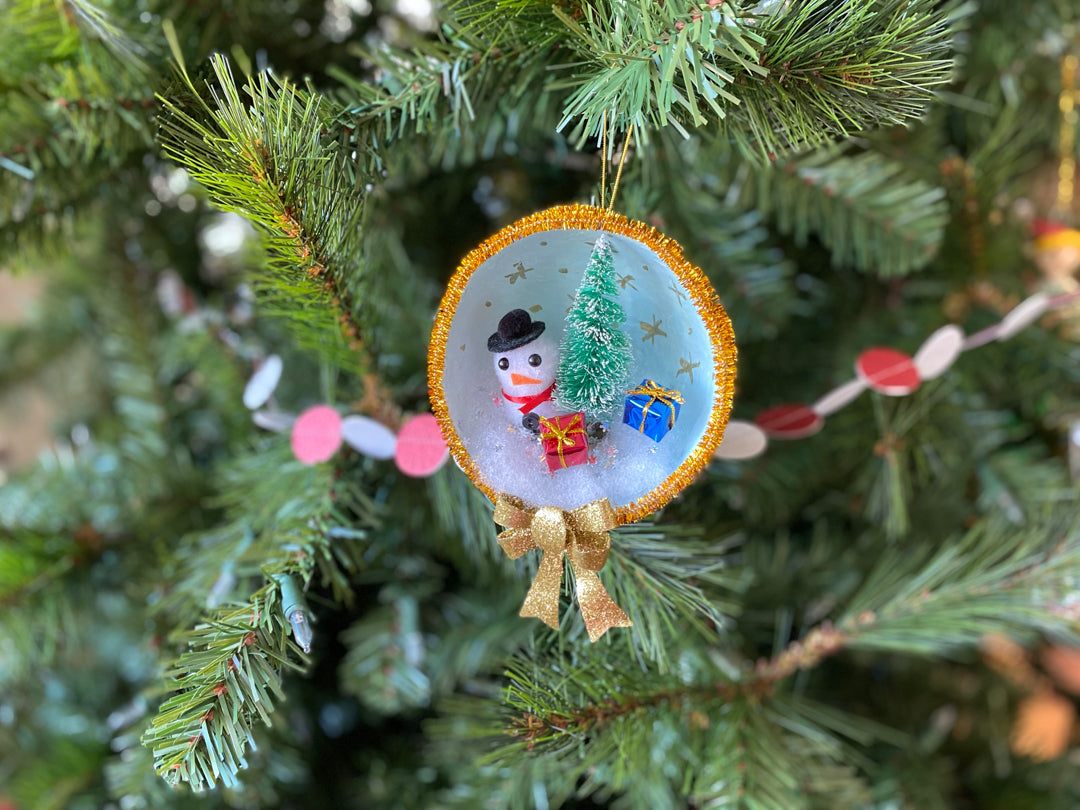
Finish off the ornament by gluing a gold ribbon at the bottom!

You can use a variety of miniatures to fill your little diorama to create all kinds of holiday scenes. The mini dioramas are an adorable site to see hanging on your Christmas tree!

 Gina Kim is an artist and designer based in New Jersey. After graduating from the Rhode Island School of Design, she entered the toy and craft industry where she has developed children’s products for almost 15 years. For the holidays, she is looking forward to her favorite personal tradition of curating and baking the perfect Christmas cookie box which has been six years in the making!