
Color-Blur Canvas Envelope DIY
Mailing artful creations via the trusty usps is a fun, fun pastime. It will delight the sender (you) and definitely any friends who receive it (we promise!). The more peculiar your posts are, the gigglier everyone will be. Here are instructions for one beautiful piece of mail to construct, decorate, imbue with you-ness…and entrust to postal workers!
Supplies needed:
- Artist’s Canvas (or Linen Fabric)
- Scissors
- Paint
- Glue
- Permanent Marker
- Postage Stamps (exact postage depends on size and weight)
Directions:

1. On a piece of canvas (or linen), paint an abstract design. If you paint a large piece of canvas you can get multiple envelopes out of it, but a small piece is fine too!

2. Once your painting is dry, trace a rectangular book on the back of the canvas. Do this three times (the center rectangle is the body of your envelope).

3. Draw envelope flaps out of the side rectangles. Make them big because you can always trim them smaller. (Side flaps should be around ¾ the width of the main body.)
NOTE: If you want to skip steps 2 and 3, you can unfold an existing envelope and trace it.

4. Cut your envelope shape out, and fold it together to see if the dimensions are right. Trim flaps if needed.

5. Glue side flaps to each other (where they overlap). Then glue bottom flap over those. Leave top flap open, to insert your note!

6. Cut out a few bits of painted canvas from your scraps. You can make them any shape you like.

7. Insert a note to your friend. Seal envelope closed by gluing the canvas bits over the top flap.

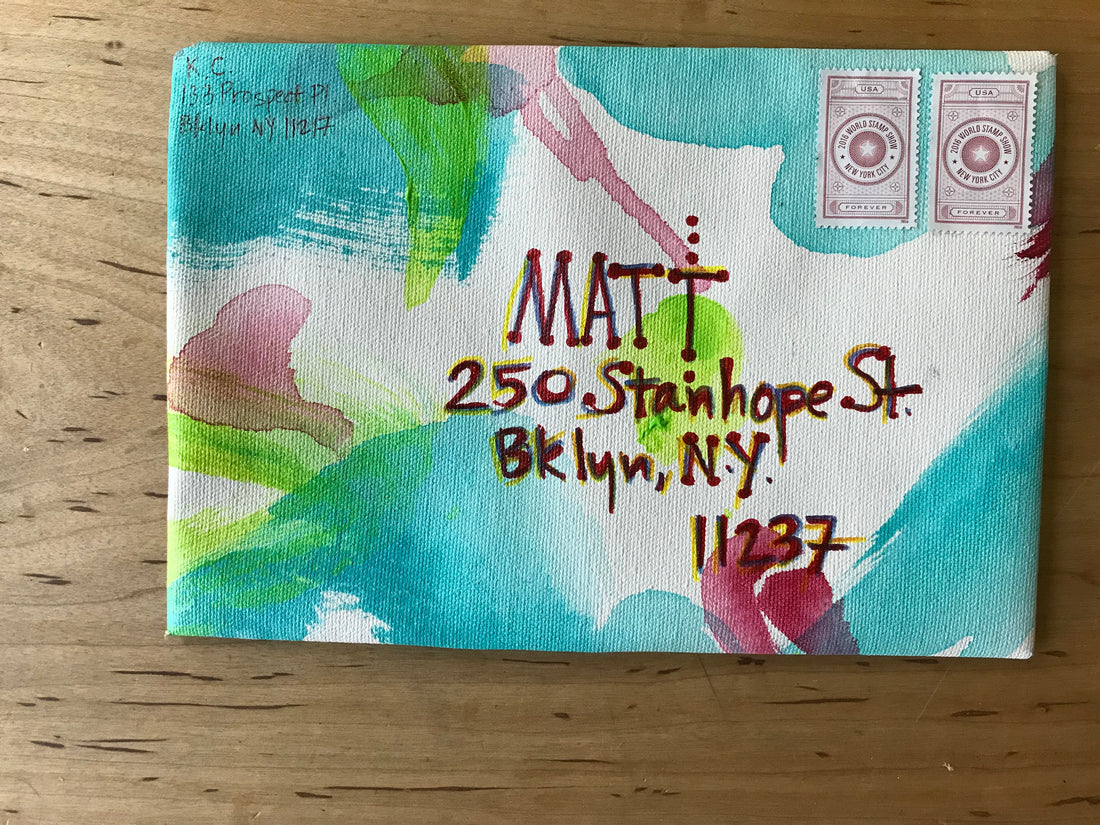
8. Write your friend’s address on front with a permanent marker so it doesn’t bleed.

9. Glue postage stamps onto it and pop it in the mail.
* * *
Post by Kiera Coffee. Kiera is a prop stylist, writer, and crafter. To peek into her world of ideas (and postal high jinks) follow @KieraCoffee or visit kieracoffee.com.