
Craft Stick Fairy House
Summertime is the perfect time to dress up your yard by making some fun little fairy houses. Your kids will love this imaginative and open-ended project! You can craft a single house, or do as my children do and make an entire town. Follow these simple instructions to create your own fairy house!
This project is very simple and requires a few basic supplies:
- Kid Made Modern Arts & Crafts Library
- Scissors
- Glue
- Cereal box (or other thin cardboard)
Instructions:
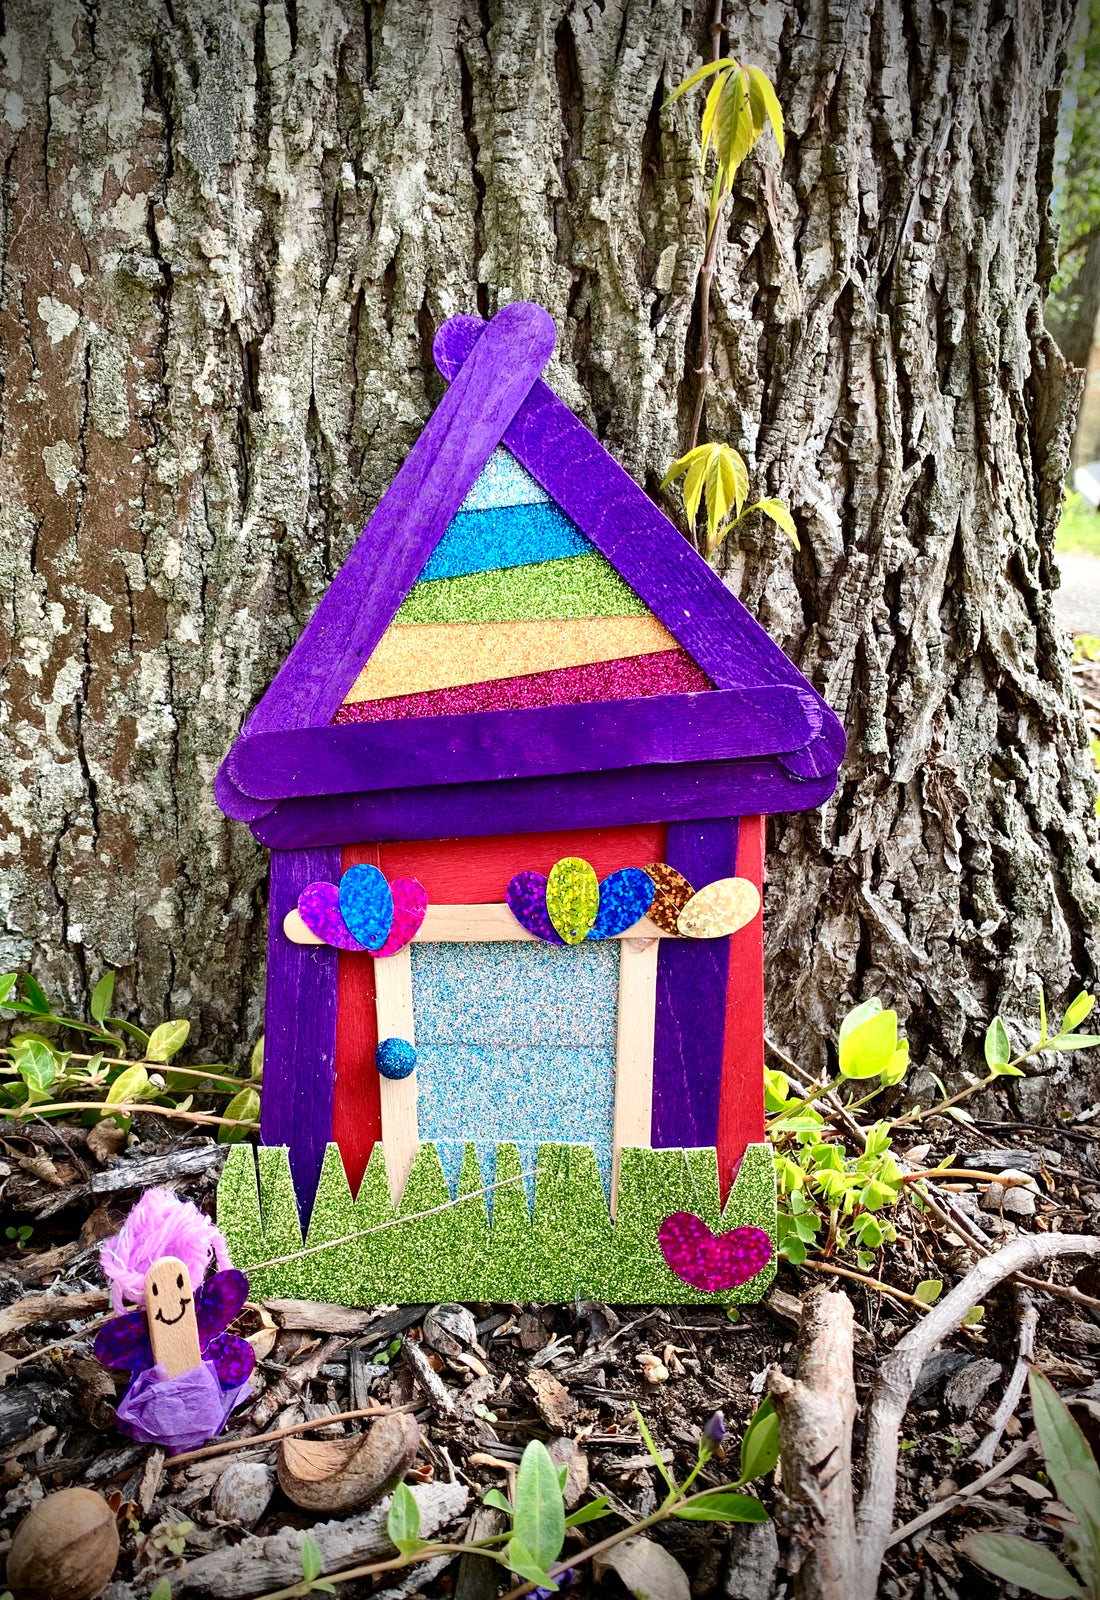
- To make the fairy house, start with a thin piece of cardboard. Using your scissors, cut a triangle shape to form the roof of the fairy house.
- Use bits and pieces of your Arts & Crafts Supply Library to add details to the roof, and secure them with glue. We enjoyed layering sparkly cardstock to form a rainbow roof! Use your imagination here and keep in mind, there is NO right or wrong way to do this!

3. Frame out the roof of your fairy house with craft sticks, and then start working on the bottom half of your fairy house. Glue three craft sticks together to form a door. Behind your door, you can add cardstock or paper as we have here, and add a doorknob using a bead.

4. Add a garden in the front of your fairy house by trimming the tops of some green cardstock, and gluing it down in front of your house. Glue oval-shaped craft bits and bobs together to form flowers, and arrange them decoratively.

Fairy houses are a truly one of the most wonderful project for kids, and one that we come back to time after time. With a little bit of creativity and a lot of imagination, your children will love creating these fairy houses.


Jaclyn Ryan is the voice behind Creative Fun for Kids, where she shares creative inspiration for life at home with kids.