DIY Bug Box
Share
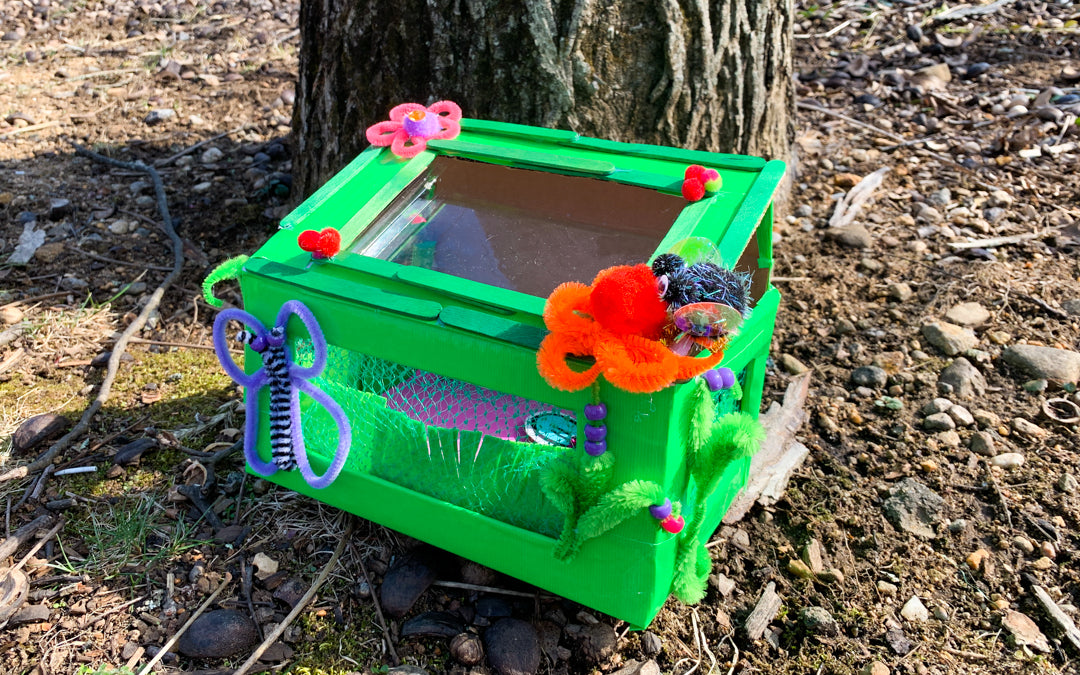
We are busy preparing for spring and the start of “bug season” with just the right tool to entice kids to get out in the backyard… our very own DIY bug box! It is the perfect activity for bug lovers and one that can be used both at home and in schools.
Within our bug box, there are three sides of mesh to provide lots of fresh air, a big observation window on the top that is clear (a recycled fruit container), and lots of nature-inspired decor.
When making your own bug box, encourage kids to follow the ‘catch and release’ rule, and try not to hang on to your bug for too long. There is no harm in bringing a bug home for a day to observe it closely and to learn more about them, but bugs are happiest in their natural environment.
To make your own bug box, you can use any clean, dry box or jar. We constructed our bug box from mostly recycled materials, as we are big believers in using what we already have on hand when making crafts for kids. Of course, we had a lot of help from Kid Made Modern’s Deluxe Arts & Crafts Supply Collection, too!
Materials Needed:
- Kid Made Modern Head Deluxe Arts and Crafts Supply Collection
- Cardboard box
- Scissors
- Mesh lining (from produce bag)
- Hot glue gun
- Recycled plastic container (a fruit or berry container works great)
- Paint and/or colored craft tape (optional)

Instructions:
Step 1
Gather your materials. From the recycling bin, we used a cardboard box, a plastic berry container, a plastic lid and the mesh from a produce bag.
Step 2
Draw four rectangles on each side of your box, not including the bottom. We just eyeballed it! Just be sure the window openings aren’t too big for your plastic lids and mesh bag.
Step 3
Cut open each window using a good pair of scissors - you can also use an exacto knife if the cardboard is too thick. Children will need an adult’s help with this part.

Step 4
This is optional, but fun! Use craft tape to give your bug box some flair. Alternatively, you can paint it! We chose the color green so that our bug box would blend in with it’s natural surroundings.

Step 5
Use a glue gun to attach the mesh from a produce bag to the inside of your bug box windows. Then, attach your plastic lid to the top inside window to create your “observation window”.

Step 6
Use your Kid Made Modern Deluxe Arts and Crafts Supply Collection to add some flair! You can create your own flowers or bugs, and use many of the items in the kit for inspiration! We used craft sticks, fuzzy sticks, felt, pom poms, and more to enhance our design. We used felt to create a natural grass layer on the bottom inside, and we put foam down at the bottom of the bug box so that it would be nice and soft for our bugs.

Remember to allow your children to use their creativity and imagination when doing this part, as there is absolutely no right or wrong way to complete this.
When your bug box is complete, head outside and set it down on the ground along with items from nature inside. When your bug visitors arrive, use the clear plastic observation window to observe the bug's features and behavior. After a little while you will be able to tell that your bug is ready to go back to their own natural environment, and you can set them free.

About the Author:
Jaclyn Ryan is a mom of four and former teacher. She lives in Connecticut with her family and prefers to engage her children in activities that foster creativity and connection -- and that are also fun!
