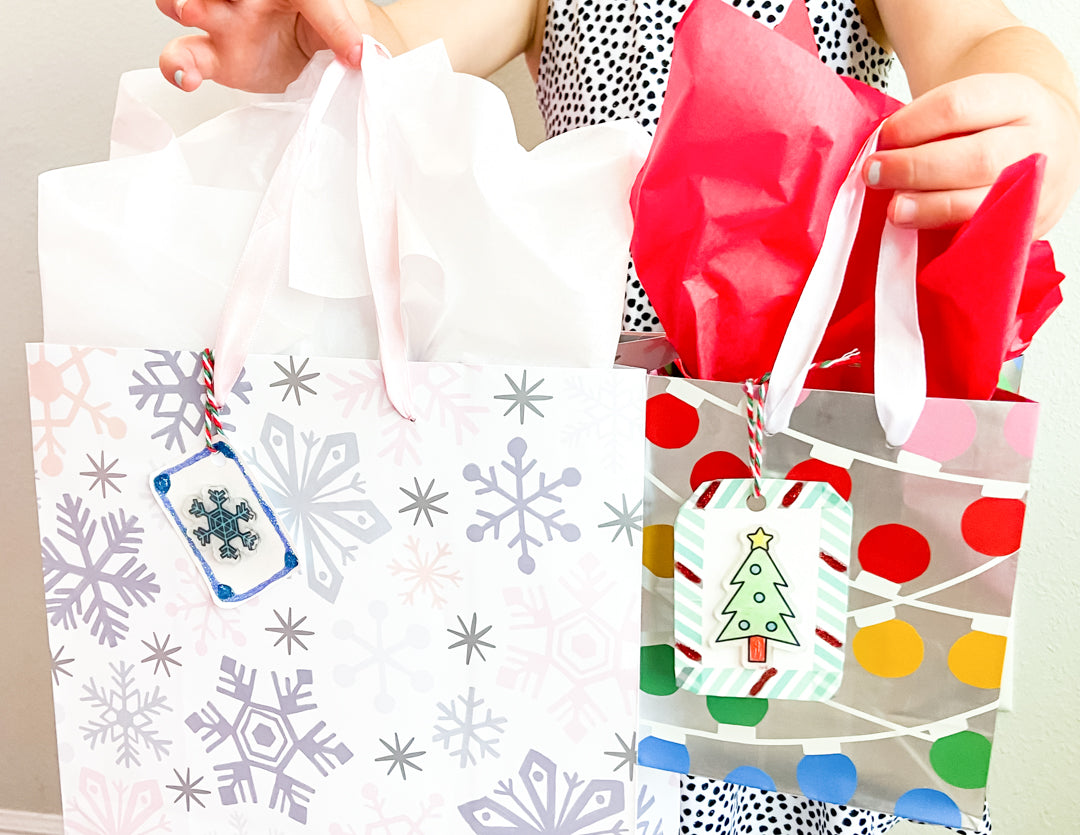
DIY Shrink Art Gift Tags
Share
Growing up, I was always sitting at a kids table in our kitchen working on some crafting project that my mom had set out for me. I'm so thankful to share this love of crafting with my daughters. When presented with a craft kit or a fun activity, my five year old Olivia is always ready to get started.
She was SO excited to see the Christmas and Hanukkah Shrink Art Jewelry Kits when they arrived at our house! Though we celebrate Christmas, she attended a Jewish preschool for several years and has so many fond memories and pictures of holidays from those days that she was quick to grab several shrink art pieces from each kit immediately as "hers to color"!
We decided that the kits come with enough shrink art pieces to make a few pieces of jewelry in addition to some DIY gift tags! After making our shrink art jewelry, we grabbed a few other supplies from the craft cart and use the leftover pieces for the tags!

Materials Needed:
- Christmas Shrink Art Jewelry Kit
- Hanukkah Shrink Art Jewelry Kit
- Baking Sheet
- Foil
- Paper plates or construction paper
- Glue
- Glitter Glue
- Washi Tape

Instructions:
Step 1
Color the shrink art pieces on the rough side and place them on foil on a baking sheet.

Step 2
Bake the shrink pieces for 2-3 minutes in the oven. And while they're baking, leave the light on and watch them! It is so engaging to see them curl up and nearly roll over before flattening back out again. After they're flat, bake for about 30 more seconds.

Step 3
While the pieces cool, decide which ones you'll use to make jewelry and which ones you'll use the make gift tags! This is a really great executive functioning activity for your kids--having to plan out steps of a project is good for projects that will come later in school.
Step 4
Assemble your jewelry and keychains using the included beads and supplies. While you're making the pieces, discuss with your little one repeatedly which ones they should wear to school tomorrow (or maybe that was just my daughter who couldn't decide).

Step 5
Cut out little rectangles with rounded edges from the paper plates or construction paper. Pop off the little circles from the shrink pieces to make them look nicer on the tags.

Step 6
Use washi tape or glitter glue to decorate the edges and add some holiday colored flair to the tags. Glue the shrink art pieces to the tags and let them dry!

Step 7
Punch holes in the tags and tie a string to them to attach to your holiday gifts! Then stare at them and how beautiful they are, knowing your gift recipients will love the personalized touch!

We had so much fun making these jewelry pieces and the gift tags! Each step was really easy, and several of the steps acted as an activity unto themselves. I loved that we could color the pieces one day and make jewelry another! Though it's one craft kit, it's good for several activities! We love that about all of our Kid Made Modern Kits.
We hope you have a wonderful holiday season and look forward to seeing your shrink art jewelry and gift tags!

Meghan is a busy mom to Olivia and Maddie. She’s a full time teacher and part time playtime planner. She runs the playtime planner business and would love to help you fit more playtime and activities into your busy schedule.

