
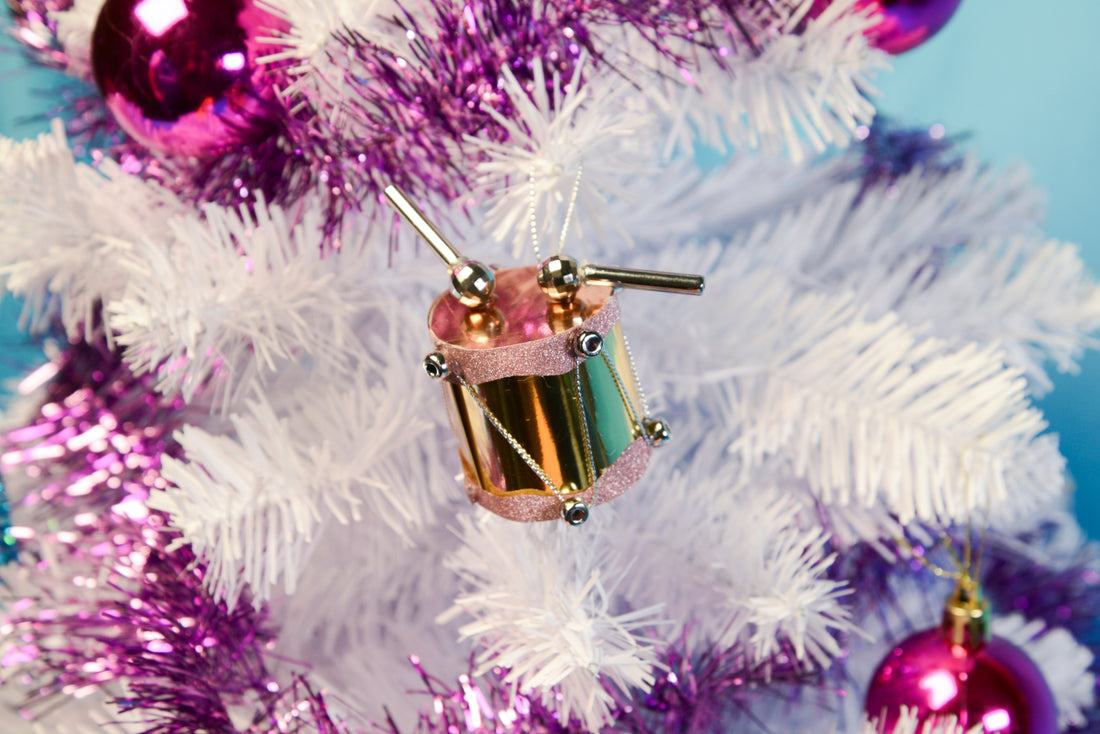
Drum Ornament DIY
Ingredients:
- Copper Washi Tape
- Silver Cording
- 1 Sheet Rose Gold Sticker Paper
- 1 Sheet Yellow Gold Sticker Paper
- 2 Silver Disco Ball Beads
- 9 Silver Pony Beads
- 2 Silver Jumbo Bugle Beads
Instructions:

1. Take the backing off of the yellow gold sticker paper and gently bend it into a cylinder shape to create your “drum”

2. Stand the drum on your sheet of rose gold sticker paper and use it as a stencil to cut out a circle that will cover the top of your drum

3. Glue the underside of the circle securely to the top by layering blobs of hot glue on the inside of the drum

4. Cut a strip of washi tape that is long enough to wrap all the way around your drum

5. Cut the strip in half lengthwise with a gently wiggling line to create two long strips of tape that have one uncut edge and one wiggly edge

6. Glue one strip to the top edge of the drum and the other to the bottom edge, lining up the uncut side with the edge of the cyllinder

7. Place a dot of hot glue on the top line of washi tape and use it to glue down the end of a piece of silver cording
8. Press one of the silver pony beads on top of the silver cording, tacking it down
9. Place a dot of hot glue on the bottom line washi tape and use it to glue down the end of a piece of silver cording
10. Press one of the silver pony beads on top of the silver cording, tacking it down
11. Repeat steps 7-10, zig-zagging between the top and bottom strips of washi tape, until you meet up with the first pony bead you glued down

12. Glue the silver disco ball beads to the ends of the two silver jumbo bugle beads to create your “mallets”

13. Glue the mallets down at a angle on the top of your drum

14. Cut a loop from the rest of the silver cording and glue it to the back of your drum ornament

15. Proudly hang your creation from your tree!
* * *
* * *
Make your own Drum Ornament using our Smarts + Crafts Metal Mash - Up Kit!
