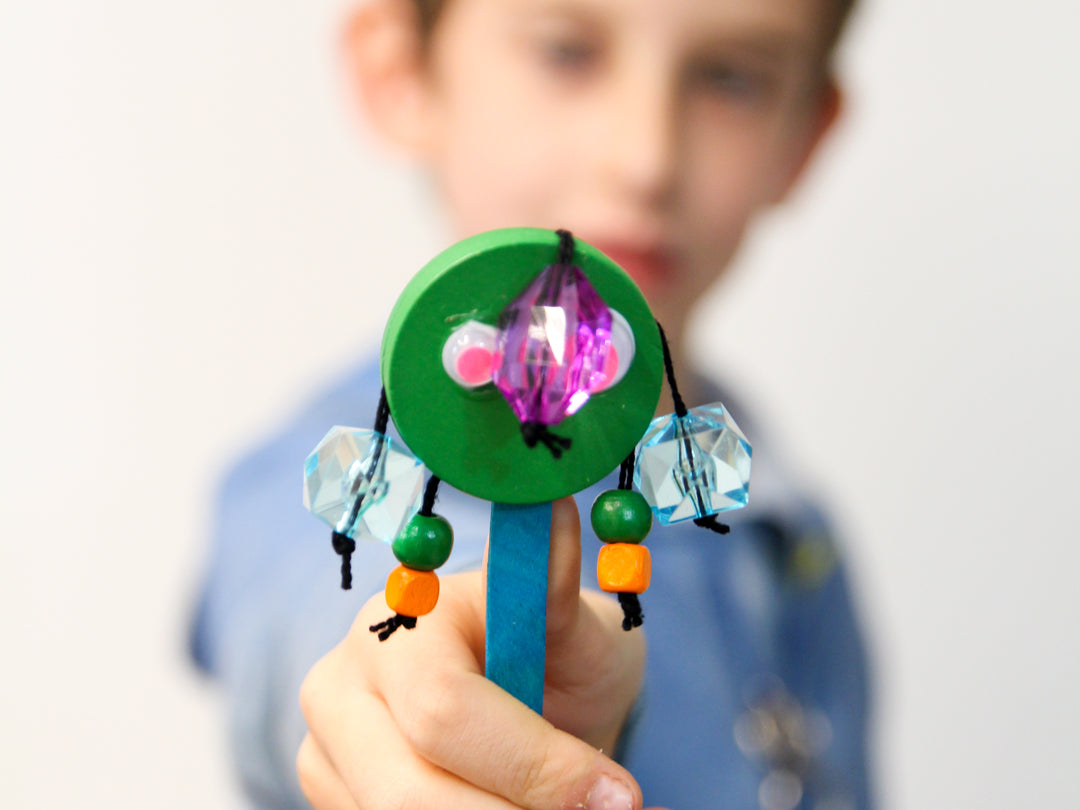
New Year's Colorful Noisemakers DIY
Share
Did I catch your attention there?
I’ve got more. All of the supplies you need are included in the Arts & Crafts Library - down to the scissors and the glue.
New Year’s comes at the tail end of the long winter break. My kids tend to be done with self-entertaining by then. We need to keep the little ones busy. But we don’t want them making too much noise, right? These noisemakers use wood and plastic beads to make noise on wooden discs, which make a fun clacking sound. And it’s not a loud in-your-face jangle.
Wooden disc noisemakers are an open-ended craft. Kids can decorate them if they’d like. Or they can leave them simple.
Momo, age 8, was able to do it almost completely by himself. I just had to tie a few knots for him. Jay, age 5, needed more guidance. He was, however, able to follow through with all the steps with assistance.
They both loved having a functional end-product they could play with, and they’ll have the time of their lives making an almost-racket when the new year arrives.
If you’re making this on New Year’s Eve, you’ll want to do it early - in the morning - so that your glue can dry in time to use it. The kids can decorate it as you’re counting down with self-adhesive items in the kit, so that there’s no dry time.
Supplies:
The Arts and Crafts Supply Library - that’s it! You’ll want to prepare for each noisemaker
- Two wooden discs
- One craft stick
- Floss
- Five-six beads
- Needle
- White glue
- Scissors
- Optional embellishments: sticky backed jewels, googly eyes, sequins. You can also cut out your own embellishments (such as the new year) from felt.

Instructions:
Step 1
Thread a needle with floss. Triple knot the end.

Step 2
Thread on a bead. You want to make sure it doesn’t come off the end with a bit of gentle tugging. Some of the larger hole wooden beads need a smaller one to go on first to secure it in place. Some of the smaller plastic beads won’t fit over the needle. Most of the beads in the Arts and Crafts Supply Library will work.

Step 3
Trim the floss about 1.5- 2 inches from the bead.

Step 4
Reknot the floss and repeat this process for 5-6 total beads.

Step 5
Carefully glue your strings around the perimeter of the bottom disc, with the beads far enough from the edge of the disc that they can move around easily (I recommend about an inch). Leave a space on the bottom for your handle. Don’t move your disc anymore until it’s completely dry. If you need a little help placing your strings in the right spot, you can nudge it in place with the tip of the glue bottle or with the craft stick you’ll be using in the next step.

Step 6
Add a line of glue from close to the top of your disc to the bottom. Glue on your craft stick.

Step 7
Add more glue on top of the craft stick and string and carefully place your second disc on top so that it aligns with the bottom one.

Step 8
After your noisemaker has dried completely you can decorate it! Get creative! Cut the number of the new year out of felt, add gems, make a silly face… the possibilities are endless.


We love crafting as a family and this is just that type of project. The kids all loved making it and playing with it. It’s a great bonding experience and the perfect start to a new year.

About the Author:

Menucha is a mother of three, ages 1-8, and the full-time craft inventor at momsandcrafters.com. Her goal is to inspire fellow parents to craft more, embrace their colorful side, and forgive themselves a little more when doing both! She aims to design doable rather than aspirational crafts for kids and adults, and loves a good open-ended creative project. Follow along at momsandcrafters.com or on Instagram @momsandcrafters.
