
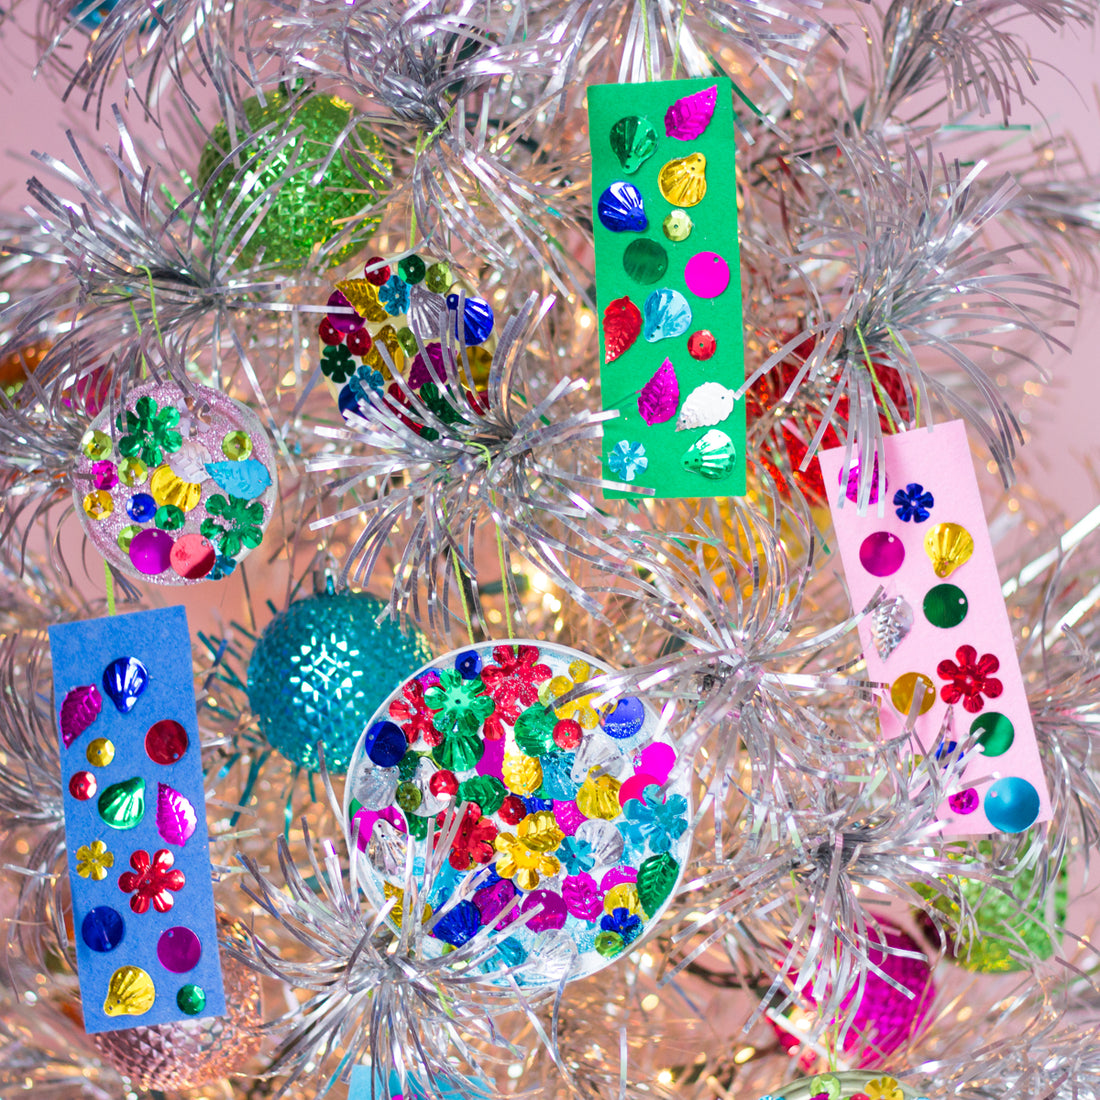
Sequin Ornaments
Add some extra sparkle to your Christmas tree with these colorful sequin ornaments! We recycled food container lids to create our round ornaments, and decorated felt pieces from the Arts & Crafts Library to create the rectangular ones. They look so pretty hung together on the tree!

Supplies
- Arts & Crafts Library (sequins, felt pieces, embroidery floss, glue)
- Recycled lids from plastic food containers or tin cans
- White glue
- Scissors
- Glitter (optional)
Steps

1. To make the lid ornaments, start with clean lids from plastic food containers or tin cans. If you are using lids from cans, make sure there are no sharp or jagged edges before using. Cover the top of the lid with an even layer of glue.

2. Stick sequins into the glue. You can sprinkle glitter onto the glue as well if you like. Let dry overnight.

3. Once the front of the ornaments is completely dry, cut a length of embroidery floss and create a loop to make a hanger for your ornament. Adhere to the back of the lid with glue or tape.

4. To make the felt ornaments, add a dab of white glue to the back of sequins and press them onto the front of a felt strip. Let dry.

5. Hang your sequin ornaments on the tree and watch them sparkle in the light!

* * *
Shop our Arts & Crafts Library here.

Post written by Haeley Giambalvo of Design Improvised, a website focused on easy DIY projects that make a big impact. Haeley loves transforming simple materials like pom-poms and pipe cleaners into cool kids projects or festive holiday crafts. Her colorful projects are perfect for the busy mom who wants to spend 30 minutes crafting by herself or getting creative with her kids. Haeley lives in San Antonio, TX along with her husband and two daughters Stella, 9, and Hazel, 7.
