
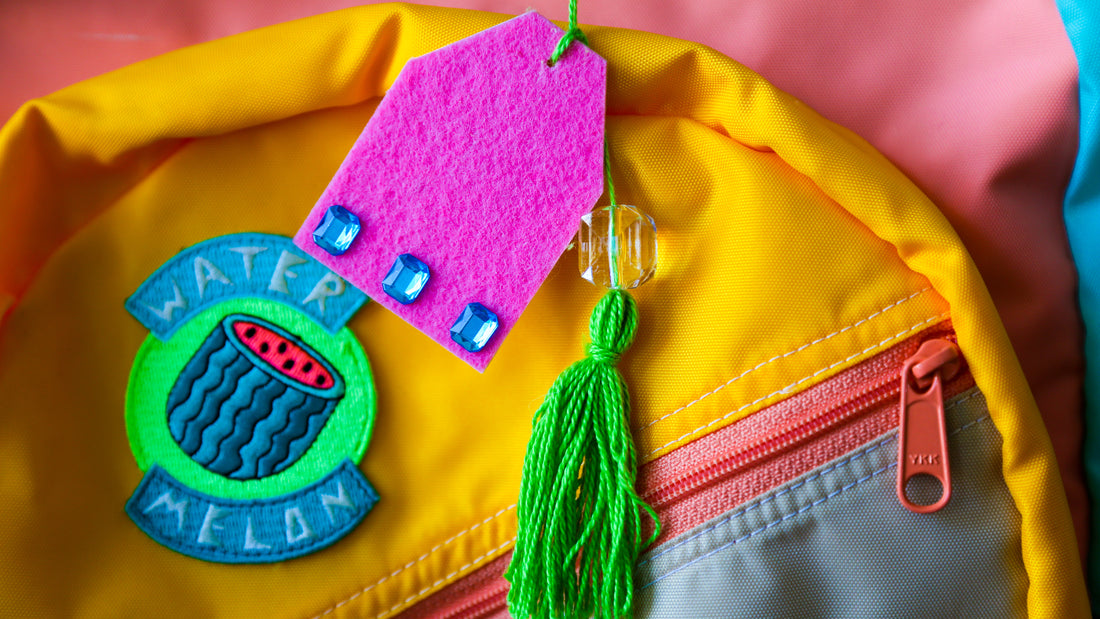
DIY Backpack // Luggage Tags
Does anyone else have a hard time telling their kids' stuff apart these days? Whether you're making that dreadful wait at the luggage carousel or just trying to scoop your child's backpack from school—it can be next to to impossible to pick your kids' bags out in a crowd of gear. Making a DIY Luggage or Backpack Tag is the perfect way for your kiddo to flex their individuality and do you a solid. Plus it just might make your kids more likely to keep track of their own stuff.

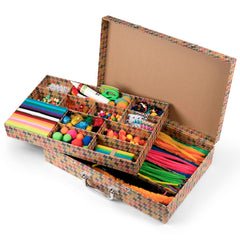
Materials:
- our Arts + Crafts Supply Library
- a pencil
- a piece of thin cardboard (the cardboard wrap around the Supply Library is perfect!)
- and a craft hole punch
Steps:


1. Make tag template: pick a piece a felt from the kit and trace the rectangle shape onto a piece of cardboard. Cut the cardboard rectangle in half and then cut notches to make a tag shape. This is your template!

2. Cut additional tags: trace your template onto additional pieces of cardboard and cut out.


3. Decorate!: glue a piece of felt onto your cardboard tag and trim to the shape. After that, the Library has soooooo many goodies to decorate. We used the embroidery floss + needle to embroider an initial on one (embroider before gluing on to the cardboard). The sticker jewels add sparkle to another. And we googley-eyed a tag as well. You can cover the back with another piece of felt or use the blank space to write in address/contact information if you wish.

4. Punch, loop, and hang: use your hole punch to punch a hole in the top of your tag. Loop a piece of embroidery floss through the hole and slip the ends through the loop. Add any beads you wish and then hang your tag on your child's luggage or backpack. Try adding a monogram using the alphabet beads or adorning it with a tassel (check out our tassel making DIY here)!

* * *
Make your own tags using our Arts and Crafts Supply Library!
* * *
