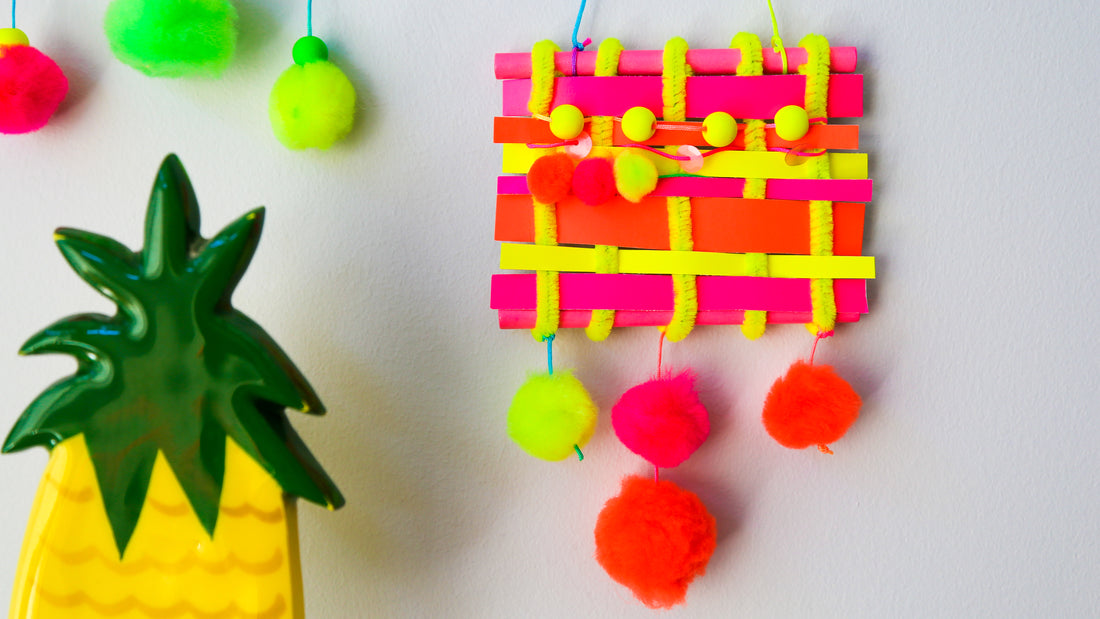
DIY Neon Woven Wall Hangings
Share
Woven wall hangings are incredibly gorgeous textiles and make a real statement in your home, but they also happen to be really fun for kids of all ages to make. While you can get fancy with a loom, you can also weave a pretty cool piece using our Bright Bundle Kit. They're the perfect size for kids to start with and will teach them the basics of weaving in no time.

Materials:
- Smarts and Crafts Bright Bundle Kit
- 2 wooden dowels or sticks, approximately 4" in length
- scissors
- a sewing needle
Steps:


1. Make the weaving frame and the warp: the vertical yarns on a traditional loom are called the warp. For our project, you'll make the frame and the warp at the same time. Lay your two wooden dowels or sticks (the dowels from our Arts and Crafts Supply Library are the perfect size!) parallel to each other. Pick five fuzzy sticks from the Bright Bundle Kit and wrap one end of each onto the top dowel—just enough so they are curved on securely. Stretch the fuzzy sticks straight down to the bottom dowel and wrap the other ends onto that. Space the fuzzy sticks evenly along the dowels, leaving about 1/4" or so of dowel at each end. Don't worry about the spacing being perfect. You can continue to adjust the warp throughout the project.

2. Add the weft: the horizontal yarns on a loom are called the weft. For this weft, you'll be using strips of neon sticker sheets. Pick a few colors of sticker sheets and cut the into varying widths of strips. Starting at one end of the frame, weave a sticker sheet strip over and under the warp, pulling it through as you go. Pick a second sticker sheet and weave across the warp. If you started with the first strip over the first string of your warp, begin threading the second strip under the first string of the warp. Repeat with different colors and widths of strips, alternating starting over/under, until you've filled in the whole weft.

3. Attach hanger: cut a length of nylon cord and tie each end onto the top dowel of your frame with a double knot. Trim the ends. Hang your weaving up for the next step!

4. Hang some poms/beads: when you're done with the main weaving, jazz it up by hanging poms and/or beads on to the bottom. Thread your needle with a piece of nylon cord and double knot at one end. Push the needle through the center of a pom and slide it onto the cord. Add beads if you like as well. Then tie the unknotted end of the nylon cord to the bottom dowel of your frame. Repeat to add additional poms or beads and aim for a variation of colors and lengths. If you're ready for the next level, try attaching tassels or making a fringe from the nylon cord along the length of the bottom dowel.

5. Add accessories to the weft: this step isn't necessary, but it might be the best part! Be creative with the kit and string beads, sequins, and poms along the weft. Thread any of those onto a piece of nylon cord. Tie the cord onto one end of the warp and then weave up and down across the warp (just like in Step 2). Tie the end onto the opposite end of the warp. You can also attach poms directly onto the warp or string a bunch of poms and weave through as the weft. We also love adding a tassel—you can find our DIY tassel tutorial here. The more variation in texture you can add at this step, the better!

* * *
Shop our Smarts & Crafts Bright Bundle Kit here!

* * *

