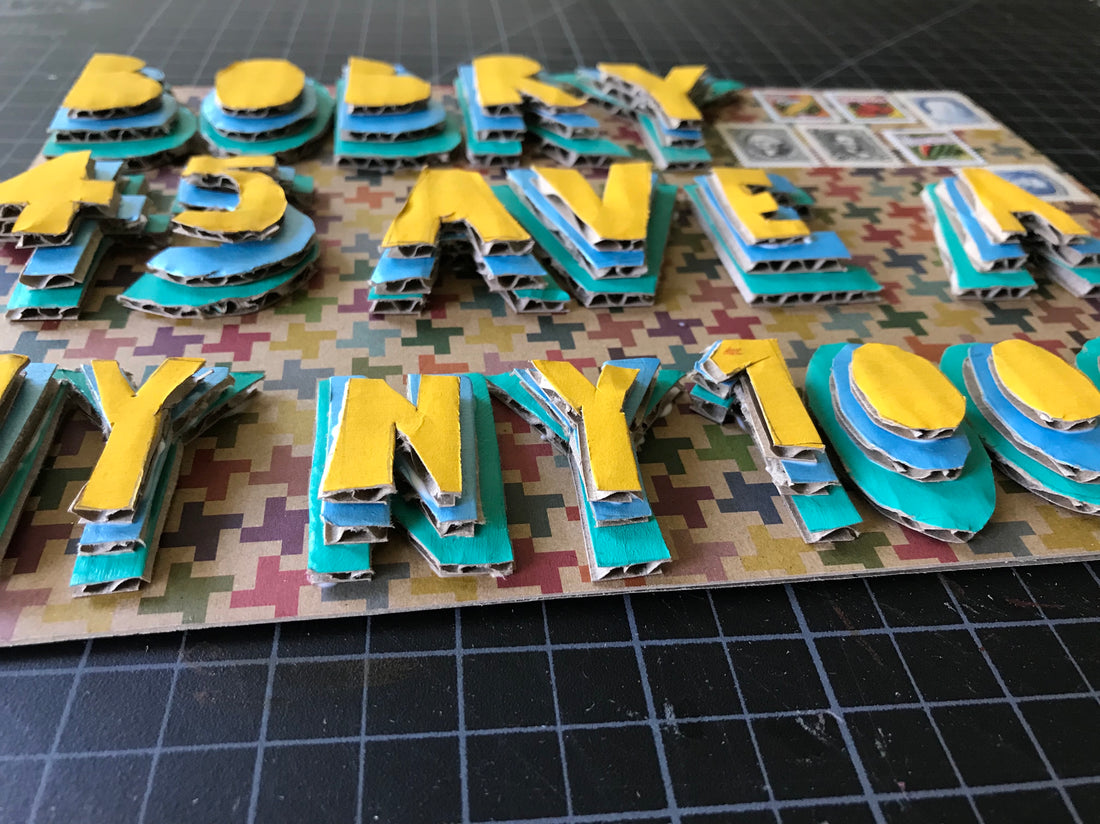
Postal Art Project: Build-Up Postcard DIY
Share
Mailing artful creations via the trusty USPS is a fun, fun pastime. It will delight the sender (you) and definitely any friends who receive it (we promise!). The more peculiar your posts are, the gigglier everyone will be. Here are instructions for one beautiful piece of mail to construct, decorate, imbue with you-ness…and entrust to postal workers!

Supplies needed:
- Corrugated Cardboard (a bunch)
- Pencil
- Scissors
- Glue
- Postage Stamps (exact postage depends on size and weight)
Directions:
1. Unfold a Kid Made Modern box and cut off the flaps so you have one flat piece. The bigger the better. In fact if your piece is smaller than 11”X8” just use some plain cardboard lying around the house.

2. Gather recycled pieces of corrugated cardboard, and paint 3 swaths of color.

3. In blocky letters, draw your friend’s name and address on one of your painted colors.
NOTE: You can usually erase pencil lines from paint, just in case you need to.

4. Cut out your drawn letters, using scissors (or a box cutter if you have an adult around).

5. When they are all done, put them on the Kid Made Modern cardboard to make sure they fit.

6. Draw and cut out your friend’s name/address again on your second painted color (yes again!) Make these a little smaller than the first set.

7. Now draw and cut out your friend’s name/address ONE LAST TIME! These should be the smallest size of all.

8. Stack everything up and make room for postage stamps. Glue each piece in place, one layer at a time (the biggest size on the bottom).

9. Write a message to your friend on the back, and attach postage stamps to the front.
10. Bask in how cool it is because it might get completely wrecked in the mail (seriously you never know).

11. Pop it in the mail.
* * *
Post by Kiera Coffee. Kiera is a prop stylist, writer, and crafter. To peek into her world of ideas (and postal high jinks) follow @KieraCoffee or visit kieracoffee.com.
